- Blog ➔
- Programação ↴
Como criar uma página de busca offline com o Gatsby
Busca JAMStack poderosa e fácil com JavaScript.
Escrito em 29 de maio de 2021 - 🕒 3 min. de leituraAo fazer um site usando JAMStack, alguns compromissos precisam ser feitos, mas a habilidade de pesquisar não é um deles, graças a bibliotecas JavaScript como flexsearch e lunr.js.
Depois de seguir este tutorial e combinar o código com o componente de autocomplete do Material UI, eu consegui criar a barra de busca que você vê neste blog.

Isso já foi bom, mas eu gostaria também de ter uma página de busca, onde um termo pudesse ser buscado nas tags, título e conteúdo do post.
Criando de um index de busca
First I will add the following code to my Gatsby config, this will create a new localSearchPage index to be queried via GraphQL.
module.exports = [
    ...otherConfigs,
    {
        resolve: 'gatsby-plugin-local-search',
        options: {
            name: 'page',
            query: `
                {
                    allMarkdownRemark(
                        filter: {
                            frontmatter:{ show: { eq: true } }
                        }
                        sort: { fields: [frontmatter___date], order: DESC }
                        limit: 1000
                    ) {
                        edges {
                            node {
                                id
                                fields {
                                    locale
                                    path
                                }
                                frontmatter {
                                    date
                                    title
                                    show
                                    tags
                                }
                                rawMarkdownBody
                            }
                        }
                    }
                }
            `,
            engine: 'flexsearch',
            engineOptions: 'speed',
            ref: 'id',
            index: ['title', 'path', 'tags', 'body'],
            store: ['id', 'path', 'title', 'tags', 'locale', 'body', 'date'],
        },
    },
];
A página de busca

Conforme mostrado no tutorial, o hook useFlexSearch pode ser usado para obter os resultados da busca, mas não há nenhuma indicação de onde o termo buscado foi correspondido nos campos do post.
const urlParams = new URLSearchParams(location.search);
const query = urlParams.get('q') || '';

const results = useFlexSearch(
    query,
    data.localSearchPage.index,
    data.localSearchPage.store
);

const getExcerpt = (post, length = 60) => {
    // magic happens here
};

const posts = useMemo(
    () => results.map(
        (post) => ({
            ...post,
            excerpt: getExcerpt(
                post.excerpt
                    // let's remove any line breaks
                    // or URLS
                    // or remove the markdown tags etc
                    // it would be better to do this in the build process
                    .replace(/(?:https?|ftp):\/\/[\n\S]+/g, '')
                    .replace(/\n/g, ' ')
            ),
        })
    ),
    [results]
);
A função getExcerpt precisa, de alguma forma, retornar o trecho do post com o termo buscado em destaque.
Portanto, preciso encontrar a posição exata do termo buscado no post e substituí-lo por um elemento HTML span, tipo <span>termo buscado aqui</span> e, para isso, usarei o bom e velho Regex.
Além disso, precisarei de uma função para “cortar” o texto e adicionar as reticências se necessário, e este código do StackOverflow fará o trabalho perfeitamente.
    const getExcerpt = useCallback((text, length = 60) => {
        // makes it lowercase to be sure to find it
        const regex = new RegExp(`\\b(${query.toLowerCase()})\\b`);
        const matchedRegex = text.toLowerCase().match(regex);

        if (matchedRegex?.length) {
            // now let's create a regex using the actual word found, capital-sensitive
            const actualQuery = text.substr(matchedRegex.index, query.length);
            const actualRegex = new RegExp(`\\b(${actualQuery})\\b`);

            // start of the excerpt
            const excerptEnd = truncateStringToWord(
                text.substr(matchedRegex.index),
                length,
                true
            );

            // yolo let's reverse the string and use the same function for the
            // beginning of the excerpt too
            const excerptStart = truncateStringToWord(
                text.substr(0, matchedRegex.index).split('').reverse().join(''),
                length,
                true
            );

            const excerpt = `${excerptStart.split('').reverse().join('')}${excerptEnd}`;

            const highlightedQuery = renderToString(
                <span className={classes.highlightedQuery}>
                    {actualQuery}
                </span>
            );

            // if nothing was found it means that the query matched
            // a tag or the post title
            return excerpt.replace(actualRegex, highlightedQuery);
        }

        return truncateStringToWord(text, length, true);
    }, [classes.highlightedQuery, query]);
Este código irá transformar uma string tipo Lorem ipsum dolor sit amet, consectetur adipiscing elit. Sed condimentum risus nec scelerisque auctor em Lorem ipsum dolor sit amet, consectetur <span>adipiscing</span> elit. Sed condimentum risus nec scelerisque auctor quando a busca for pela palavra adipiscing, e como esta string está em HTML, para exibi-la usarei a propriedade dangerouslySetInnerHTML em um elemento em.
A gambiarra com o uso reverso da função truncateStringToWord não é a melhor das soluções, mas a maior parte desse código pode ser movido para o processo de build do Gatsby, então o desempenho do blog não será afetado.
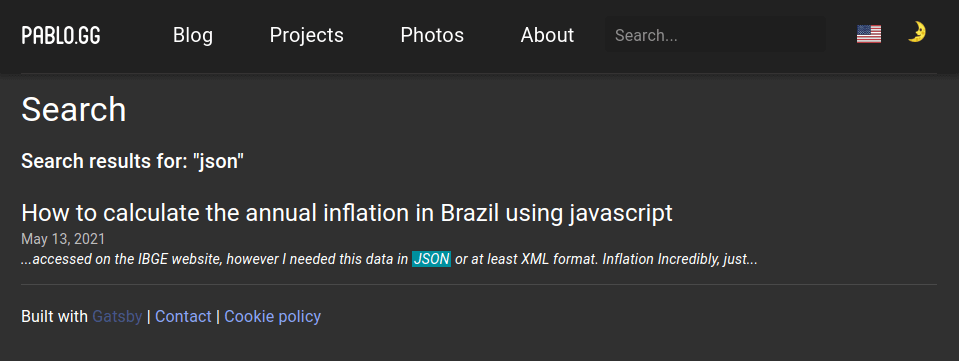
Espero que este post seja útil para você, para ver como o resultado ficou, basta buscar por algo nesse blog. Nos vemos na próxima!
Tags:
Posts relacionados
Publicar um comentário
Comentários
Nenhum comentário.


