How to automatically create thumbnails for your videos with Node.js
The best way to create thumbnails for your videos on Instagram
Written in October 25, 2023 - 🕒 5 min. readJust last week I posted about how to create upload reels to Instagram using Node.js, and in the code it was possible to upload a cover image for the video too, but I didn’t explain how to create this cover image.
I mean, of course you can go to Photopea and create a cover image for your video, but what if you want to automate this process? What if you want to create a cover image for all your videos automatically?
Well, that’s what I’m going to show you today.

Finding the right package
As a frontend developer, the only thing I know about image manipulation is by using canvas, and luckly there’s a Node.js library that allows us to do that, it’s called node-canvas.
With it, we can create a canvas, draw images, text, shapes, etc. It’s pretty cool, check out the example below:
const { createCanvas, loadImage } = require('canvas');
const { writeFileSync } = require('fs');

const canvas = createCanvas(200, 200);
const ctx = canvas.getContext('2d');
ctx.font = '30px Impact';
ctx.fillStyle = '#000';
ctx.fillText('Hello World!', 0, 0);
canvas.toBuffer('image/png', (err, buffer) => {
  writeFileSync('./hello-world.png', buffer);
});
Coming up with a design
I’m not a designer, so I’m not going to teach you how to create a good design, but I can show you how I came up with the design for my thumbnails.
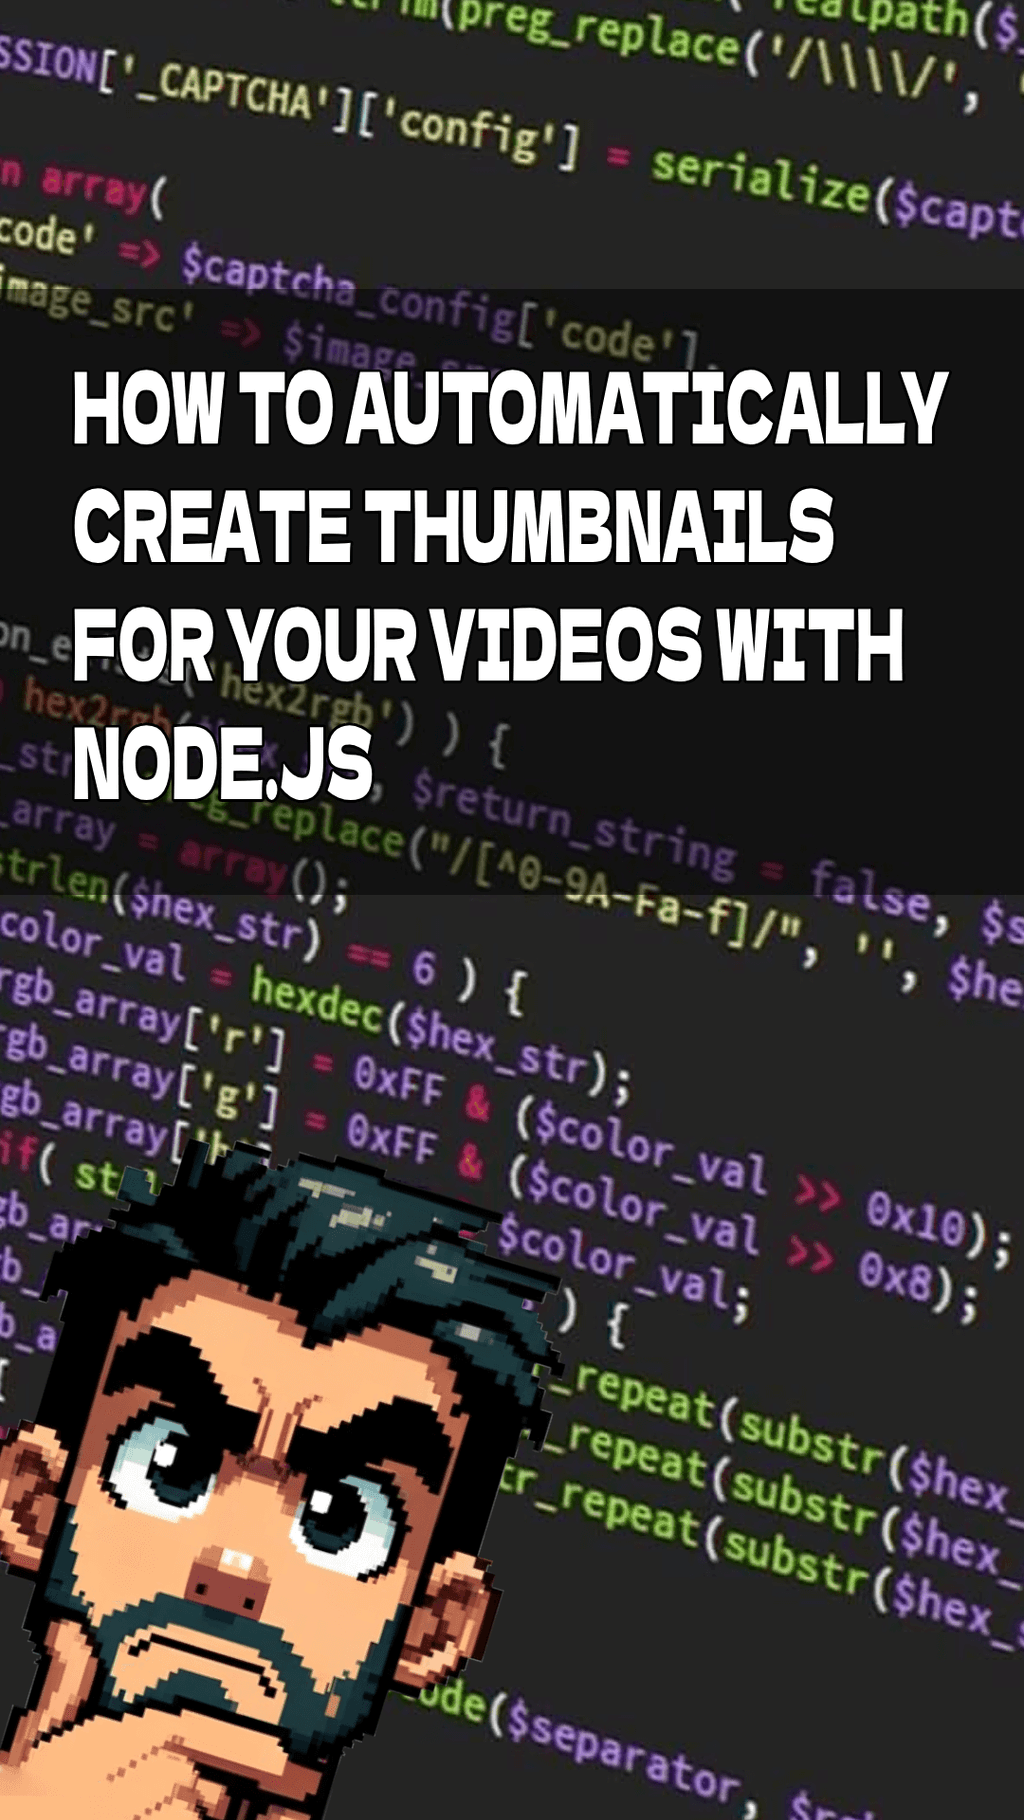
I started by creating a new file on Photopea with the same size as the Instagram Reels video, which is 1080x1920px. Then I added a background image and a text with the title of the video, and also a background color for the text with some opacity.
And for the cherry on top, I added a foreground image with a transparent background with an image of myself in pixel art style.

Creating the thumbnail
Now that we have the design, we can start coding. First, we need to create a function that will create the thumbnail for us, and it will receive a background image, a foreground image, a title and the path to save the thumbnail as parameters.
const generateImageForPost = async (
  backgroundImagePath,
  foregroundImagePath,
  title,
  outputPath
) => {
  const backgroundImage = await loadImage(backgroundImagePath);
  const foregroundImage = await loadImage(foregroundImagePath);

  const canvas = createCanvas(backgroundImage.width, backgroundImage.height);
  const ctx = canvas.getContext('2d');

  ctx.drawImage(foregroundImage, 0, 0);

  // TODO add text
  // addCenteredTextWithBackground(ctx, title, canvas.width, canvas.height);

  await new Promise((resolve, reject) => {
    const out = createWriteStream(outputPath);
    const stream = canvas.createPNGStream();
    stream.pipe(out);

    out.on('finish', () => {
      console.log('The PNG file was created.');
      resolve();
    });

    out.on('error', (err) => {
      reject(err);
    });
  });
};
This code will load the background and foreground images, create a canvas with the same size as the background image, draw the foreground image on the canvas, and save the canvas as a PNG file. That was the easy part, now we need to add the text.
The challenge here is to add the text in the center of the canvas, and make sure it won’t overflow the canvas. Let’s take a look how we can do that.
Adding the text
First, we need to create a function that will add the text in the center of the canvas, and it will receive the text and the canvas as parameters. We’re going to do that in the addCenteredTextWithBackground function.
const addCenteredTextWithBackground = (
  ctx,
  text,
  canvasWidth,
  canvasHeight
) => {
  const fontSize = 150;
  ctx.font = `${fontSize}px Impact`;
  const lines = text.split(' ');

  const textHeight = fontSize * lines.length;
  const rectWidth = canvasWidth;
  const rectHeight = textHeight + 60;

  const rectX = (canvasWidth - rectWidth) / 2;
  const rectY = 300;

  ctx.fillStyle = 'rgba(0, 0, 0, 0.5)';
  ctx.fillRect(rectX, rectY, rectWidth, rectHeight);

  ctx.fillStyle = 'white';
  for (const [i, line] of lines.entries()) {
    const textX = (canvasWidth - ctx.measureText(line).width) / 2;
    const textY = rectY + fontSize * (i + 1);
    ctx.fillText(line, textX, textY);
  }
};
This function will calculate the size of the rectangle that will be the background of the text, and then it will draw the rectangle and the text on the canvas. Unfortunately, just doing text.split(' '); won’t do the job, because splitting the text by spaces will simply make the text’s height bigger, but it won’t necessarely make the text fit in the canvas.
So let’s create a function called breakTextToFitCanvas that will receive the text, a canvas context and a maximum width as parameters, and it will return an array of strings with the text broken into lines that will fit in the canvas.
const breakTextToFitCanvas = (ctx, text, maxWidth) => {
  const words = text.split(' ');
  const lines = [];
  let currentLine = words[0];

  for (let i = 1; i < words.length; i++) {
    const word = words[i];
    const { width } = ctx.measureText(`${currentLine} ${word}`);

    if (width < maxWidth) {
      currentLine += ` ${word}`;
    } else {
      lines.push(currentLine);
      currentLine = word;
    }
  }

  lines.push(currentLine);

  return lines;
};
Putting it all together
Now that we have all the functions we need, we can put it all together and create the thumbnail. Let’s create a function called generateThumbnail that will receive the title of the video and the path to save the thumbnail as parameters.
const generateThumbnail = async (title, outputPath) => {
  const backgroundImagePath = './background.png';
  const foregroundImagePath = './foreground.png';

  await generateImageForPost(
    backgroundImagePath,
    foregroundImagePath,
    title,
    outputPath
  );
};
And now we can call this function and create the thumbnail.
generateThumbnail('How to create thumbnails for your videos with Node.js', './thumbnail.png');Conclusion
And that’s it! Now you can create thumbnails for your videos automatically. I hope you enjoyed this post, and don’t forget to check how to upload Instagram Reels using Node.js.
See you next time!
Tags:
Related posts
Post a comment
Comments
No comments yet.
